October 11, 2011
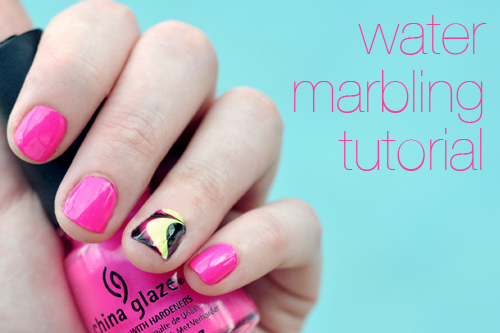
Water Marbling Tutorial


I’ve never been adept at painting my nails, nor have I frequented salons. With sewing and using scissors constantly, my nails are left a mess. However, since I’ve started wearing more accessories, I’ve been into keeping my nails looking somewhat presentable. When I’m in Florida, I call on my sister, Amanda, to do my nails. When I asked her what she knew about water marbling (I’ve recently become mildly obsessed), she agreed to do a step by step tutorial for my readers. Keep reading for step by step instructions on how to achieve this effect!
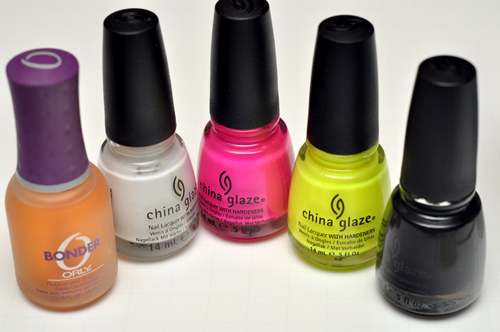
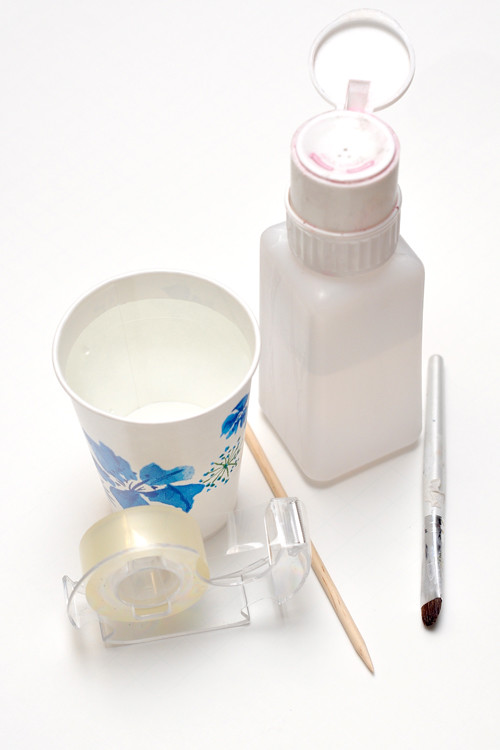
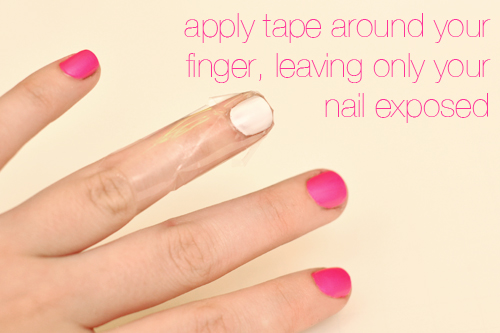
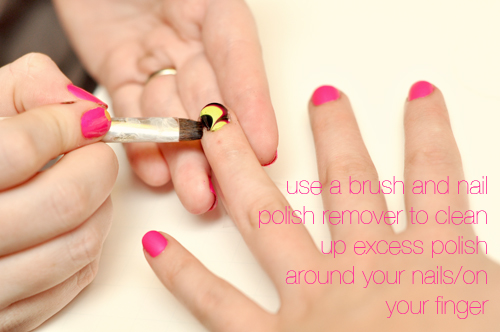
Gather all of your tools. I forgot to list top coat, but that should also be included. You’ll need at least two colors of polish (any colors) to do your water marble. If you don’t have an orange stick, a toothpick or the handle of a thin paint brush will also do. If you don’t have a brush to clean up around your nail, a q-tip will work.
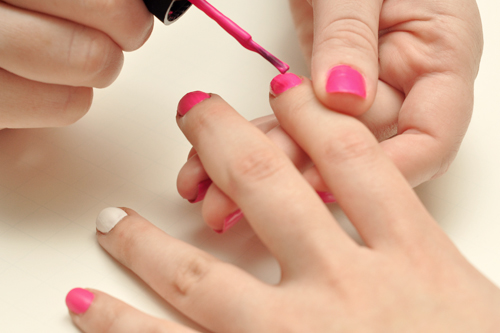
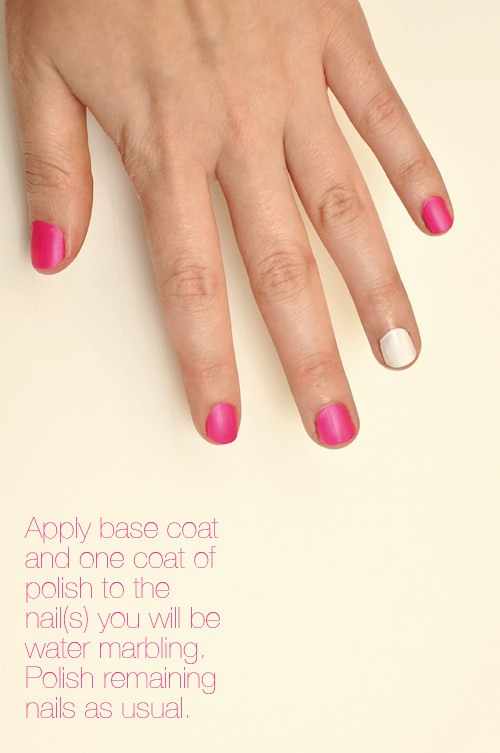
I chose a white polish as my first coat before marbling, because it makes the colors pop.
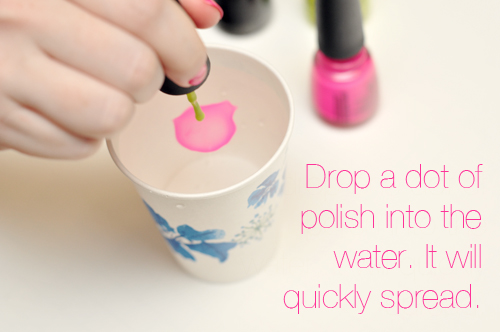
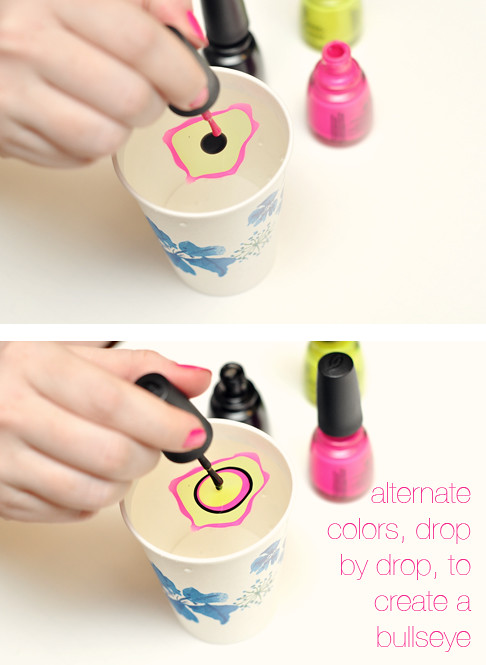
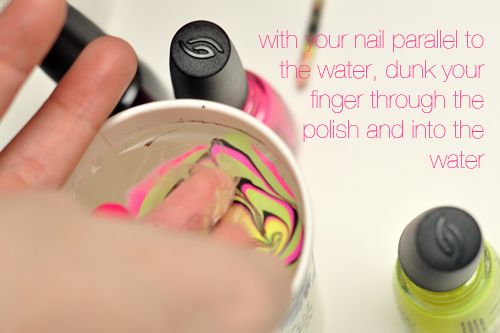
The bigger the bullseye, the better. Keep adding polish and it will continue to spread across the water.

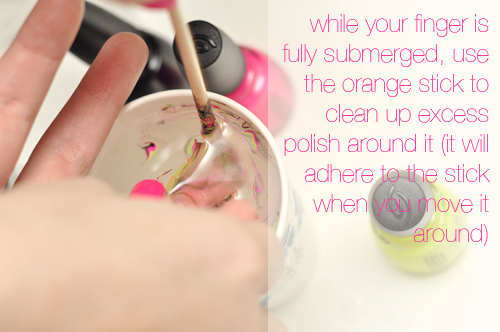
Do this quickly, before the polish dries. Drag the orange stick very lightly through the polish, not into the water.
It might take a bit of practice to make it perfect but once you have the hang of it, it’s a lot of fun and easy to do!

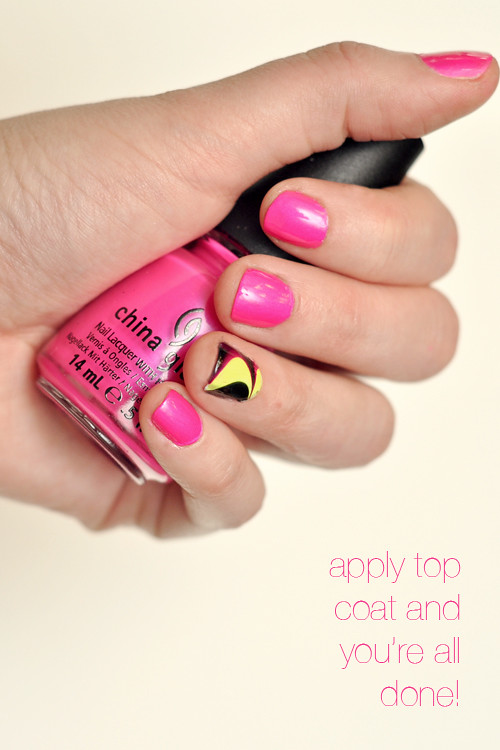
p.s. For the other water marbled nail, we used just the yellow and pink, skipping the black.