March 4, 2015
Floral Letters DIY Tutorial
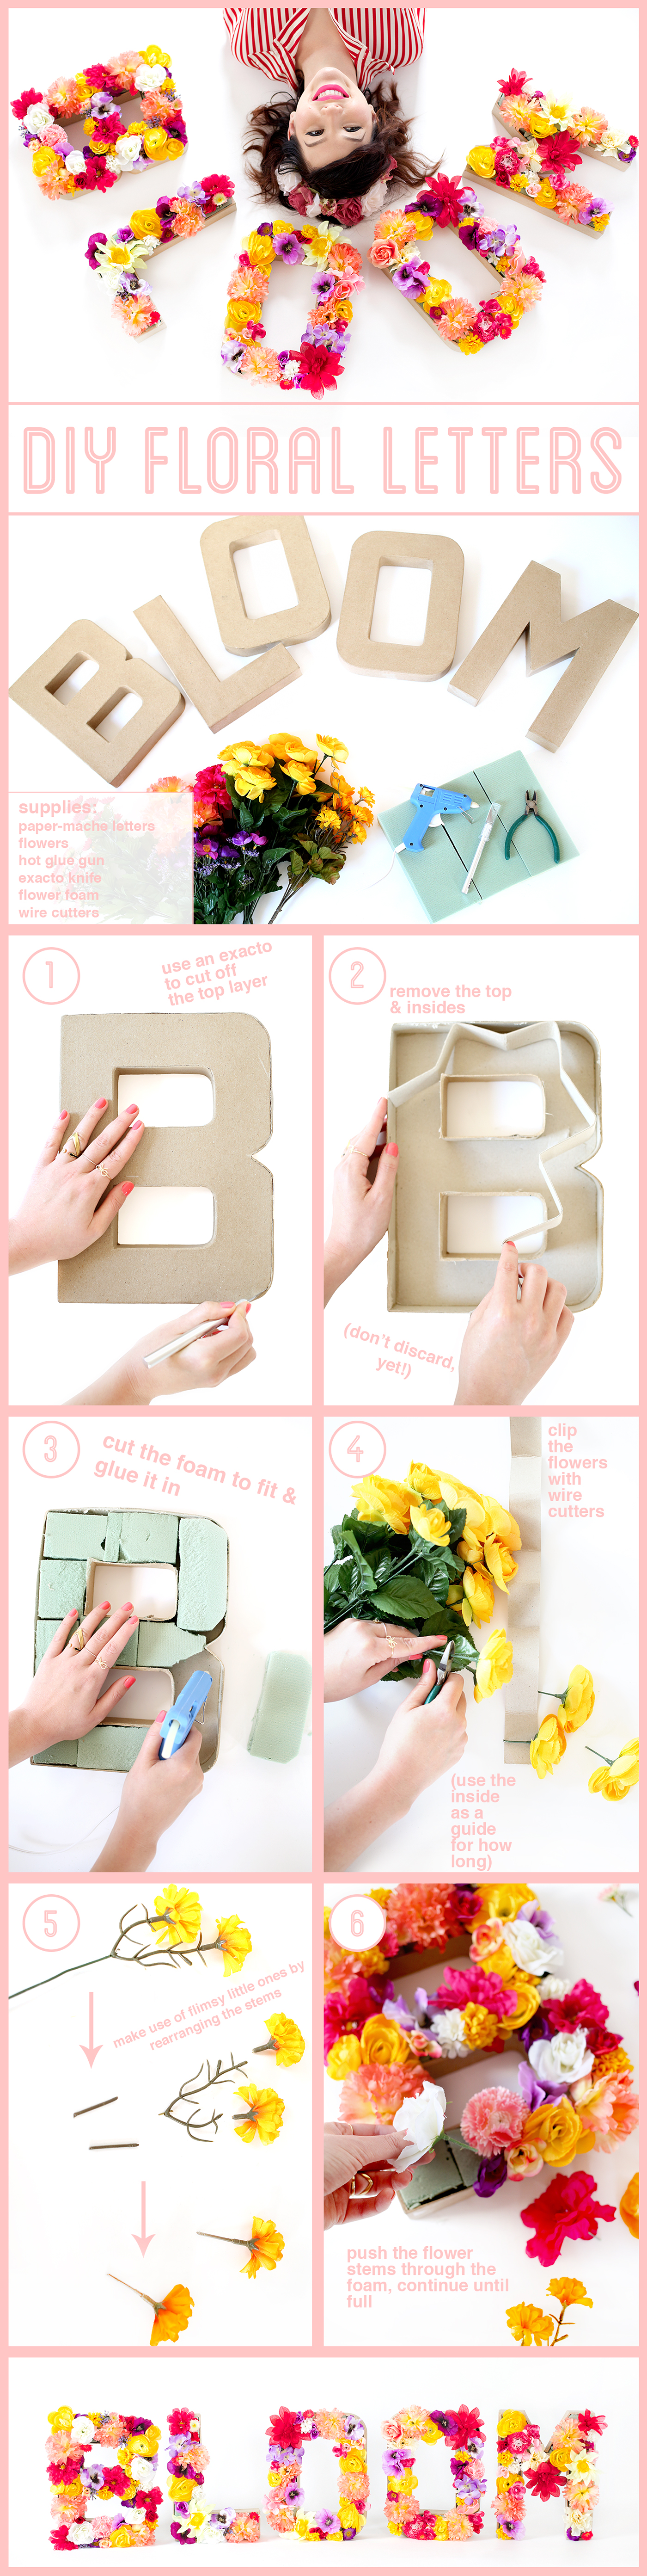
(click for larger image)
As requested, here’s my floral letter how-to. I’m not the first to make flower letters, nor am I reinventing the wheel in my process – but I’m hoping this step by step tutorial will help you create your own, since so many of you have asked me to break it down for you! Back when we first signed the lease on our studio, I was browsing Pinterest for some DIY decor ideas, when I came across some floral letters that I loved, and decided to create my own. Only, I decided to spell out an entire word (see my original project, here), and without the original source for reference (which is one thing I hate about Pinterest), it was a little bit of trial and error. Above, I broke it down step by step, but here are a few more tips that I learned along the way:
1. The larger paper-mache letters are easier to work with, unless you have teeny tiny flowers. I got mine at a local craft store (most have them in stock). You can also find some online.
2. Use the inside cardboard as a guide for how long to cut the stems – you don’t want them to be too short or too long.
3. Don’t waste the tiny flowers – they’re great for filling in gaps! Utilize these by pulling them off the flimsy plastic and replacing them with cut pieces of wire. And pssst – dollar stores are great for cheap flowers. Believe me, it can get expensive elsewhere!
4. If you have any issues with flowers not staying, reinforce with glue. Have fun!