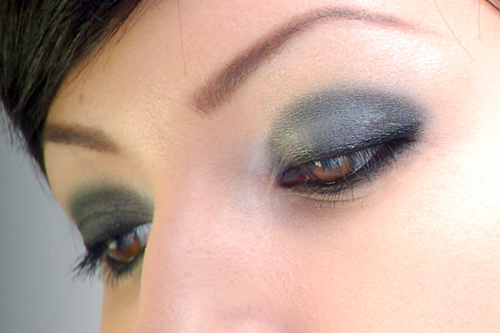

Makeup Monday: Simple Smokey Eye


Smokey eyes are one of the easiest looks to achieve. I can’t say this enough: blending is the key to achieving this look. I know I sound like a broken record, “Blend, blend, blend!” – but so many people forgo it and end up with a mess. Smokey eyes can be as subtle or dramatic as you want, but the lines should be diffused – hence the name, smokey. For this Makeup Monday, I decided to give you a step by step guide to achieving a simplistic smokey eye:
1) Prep your lids with a neutral base or primer. I used MAC Bare Study paint pot, all over my lids and up to my brows.
2) OPTIONAL: Using a soft black eyeliner, color in your lids (only up to the crease), following the natural eye shape. Blend with your finger or a sponge tipped applicator.
3) Apply a soft black eyeshadow (I used MAC Carbon) to your lids and up to your crease, following your natural eye shape.
4) Using a more concentrated crease brush (I use either the MAC 219 – my favorite – or the E.L.F. crease brush), pack the same black eyeshadow into your crease and on your outer lids. You want the pigment a little darker here.
5) Blend like crazy, up and out. You want this to look diffused, with no harsh lines. This is going to bring the softened color above your crease and extended a bit in your outer lid. To blend, I use a MAC 224 in small, circular motions. If you don’t have a brush like this, you can use a regular eyeshadow brush (same small, circular motions) or even your finger.
6) Put a little bit of shimmery white/silver/pink or whatever light color eyeshadow you want on the very outside of the black. Blend it into the shadow. This will make the outside even softer.
7) Add a little more of that shimmery shadow in the inner corners of your eyes, and on your brow bone (I skipped the brow bone because my base was already shimmery).
8) Line the top and bottom lash line. Smudge with a brush or sponge applicator.
9) OPTIONAL: Go over the bottom lash line with black shadow and blend.
10) Add mascara. Done!
Love love,
Keiko Lynn

