May 28, 2020
Tea for Three: How to Make a Simple Composite in Photoshop (with video tutorial)
When I first posted one of these photos (and the final stop motion result), I kept getting messages asking: “What app did you use?” Well, I didn’t do this on my phone. But the good news is, it’s a whole lot easier (in my opinion) to make a simple composite in Photoshop on your actual computer, rather than trying to stitch something together on your phone. This is something even the most beginner Photoshop user can do, and I’ll walk you through the steps of duplicating yourself in a photo. I did a screen recording of my process, which you can watch below.

How to Make a Simple Photoshop Composite
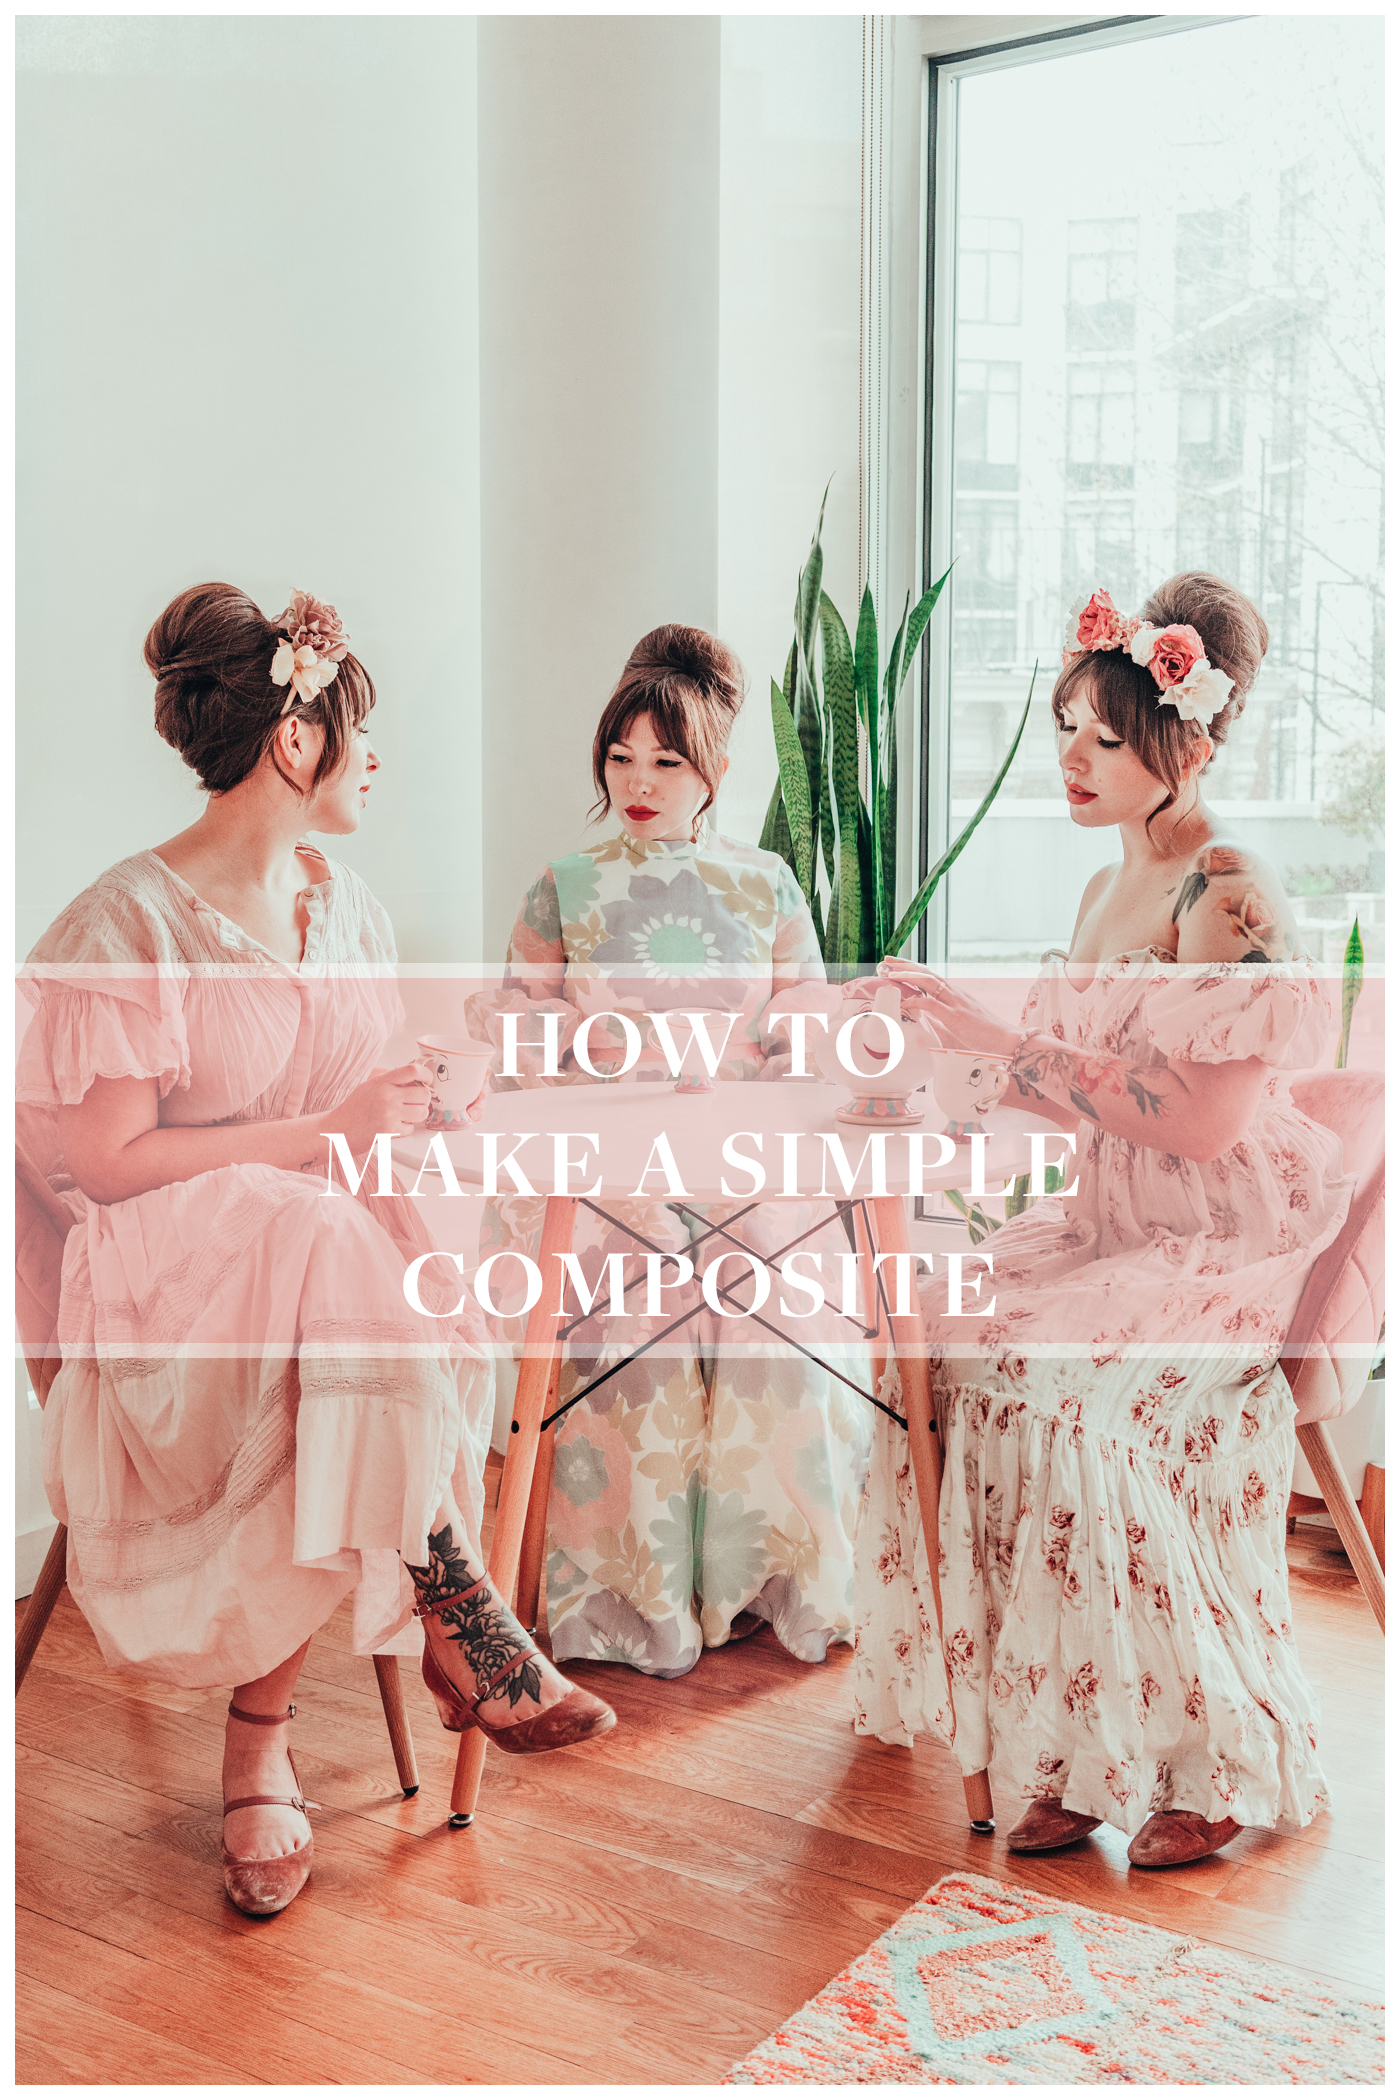
This photo was made from 3 different photos, then blended into one in Adobe Photoshop. The process is much easier with consistent light and settings. But I shot this in natural light and just tried to move quickly before it changed too much. Now, the term “composite” can be something as simple as cloning yourself multiple times in a photo, or as complicated as making a magical, otherworldly scenario, but that’s a whole different story. Today, we’re doing basic, beginner, as-little-in-post-as-possible stuff.
Here’s what you’ll need to do:
- Set up your tripod (I have this Manfrotto, but I also use this super compact one for travel). Do not touch it! In order to make this as simple a process as possible, you’ll want the same composition.
- Set it to manual focus. This will especially make a difference if you have your aperture wide open. Set it for whatever you want the focal point to be and keep it on manual for the duration.
- Actually, now that I think about it — preferably manual everything. You want each shot the same exposure and white balance, so skip the auto white balance settings, set it yourself, and save yourself time in post.
- Take however many photos you like, in different locations of the shot, different outfits, whatever!
- Open them in photoshop and combine the layers. Watch my video to see how.


In the video below, I took the 3 photos from above and combined them into one using layer masks.
Here are the steps for how to make a composite in photoshop:
- Open the images you want to combine.
- Drag and drop the second image on top of the first one, making sure it’s lined up.
- Add a layer mask (refer to video).
- Select your brush tool, set color to black.
- With the mask selected on the top layer (should be selected by default), paint over where you want the bottom image to come through.
- Black will make your top layer transparent, white will bring it back — so if you erase too much of the top layer, just switch the color to white and bring it back.
- Drag the next layer in, add a mask, and repeat.
Watch the video (and read the steps in the right hand side) to see how I do it — but let me give you one tip that will make everything so much easier: a Wacom tablet can be SO helpful for this, vs. using a track pad or a mouse. Especially with fine details, it will save you so much time! I use the Intuos Pro, but the less expensive one is all you’ll need for projects like this. Let me know if you have any questions!