February 22, 2022
Pink and Green Living Room Design Transformation with Havenly

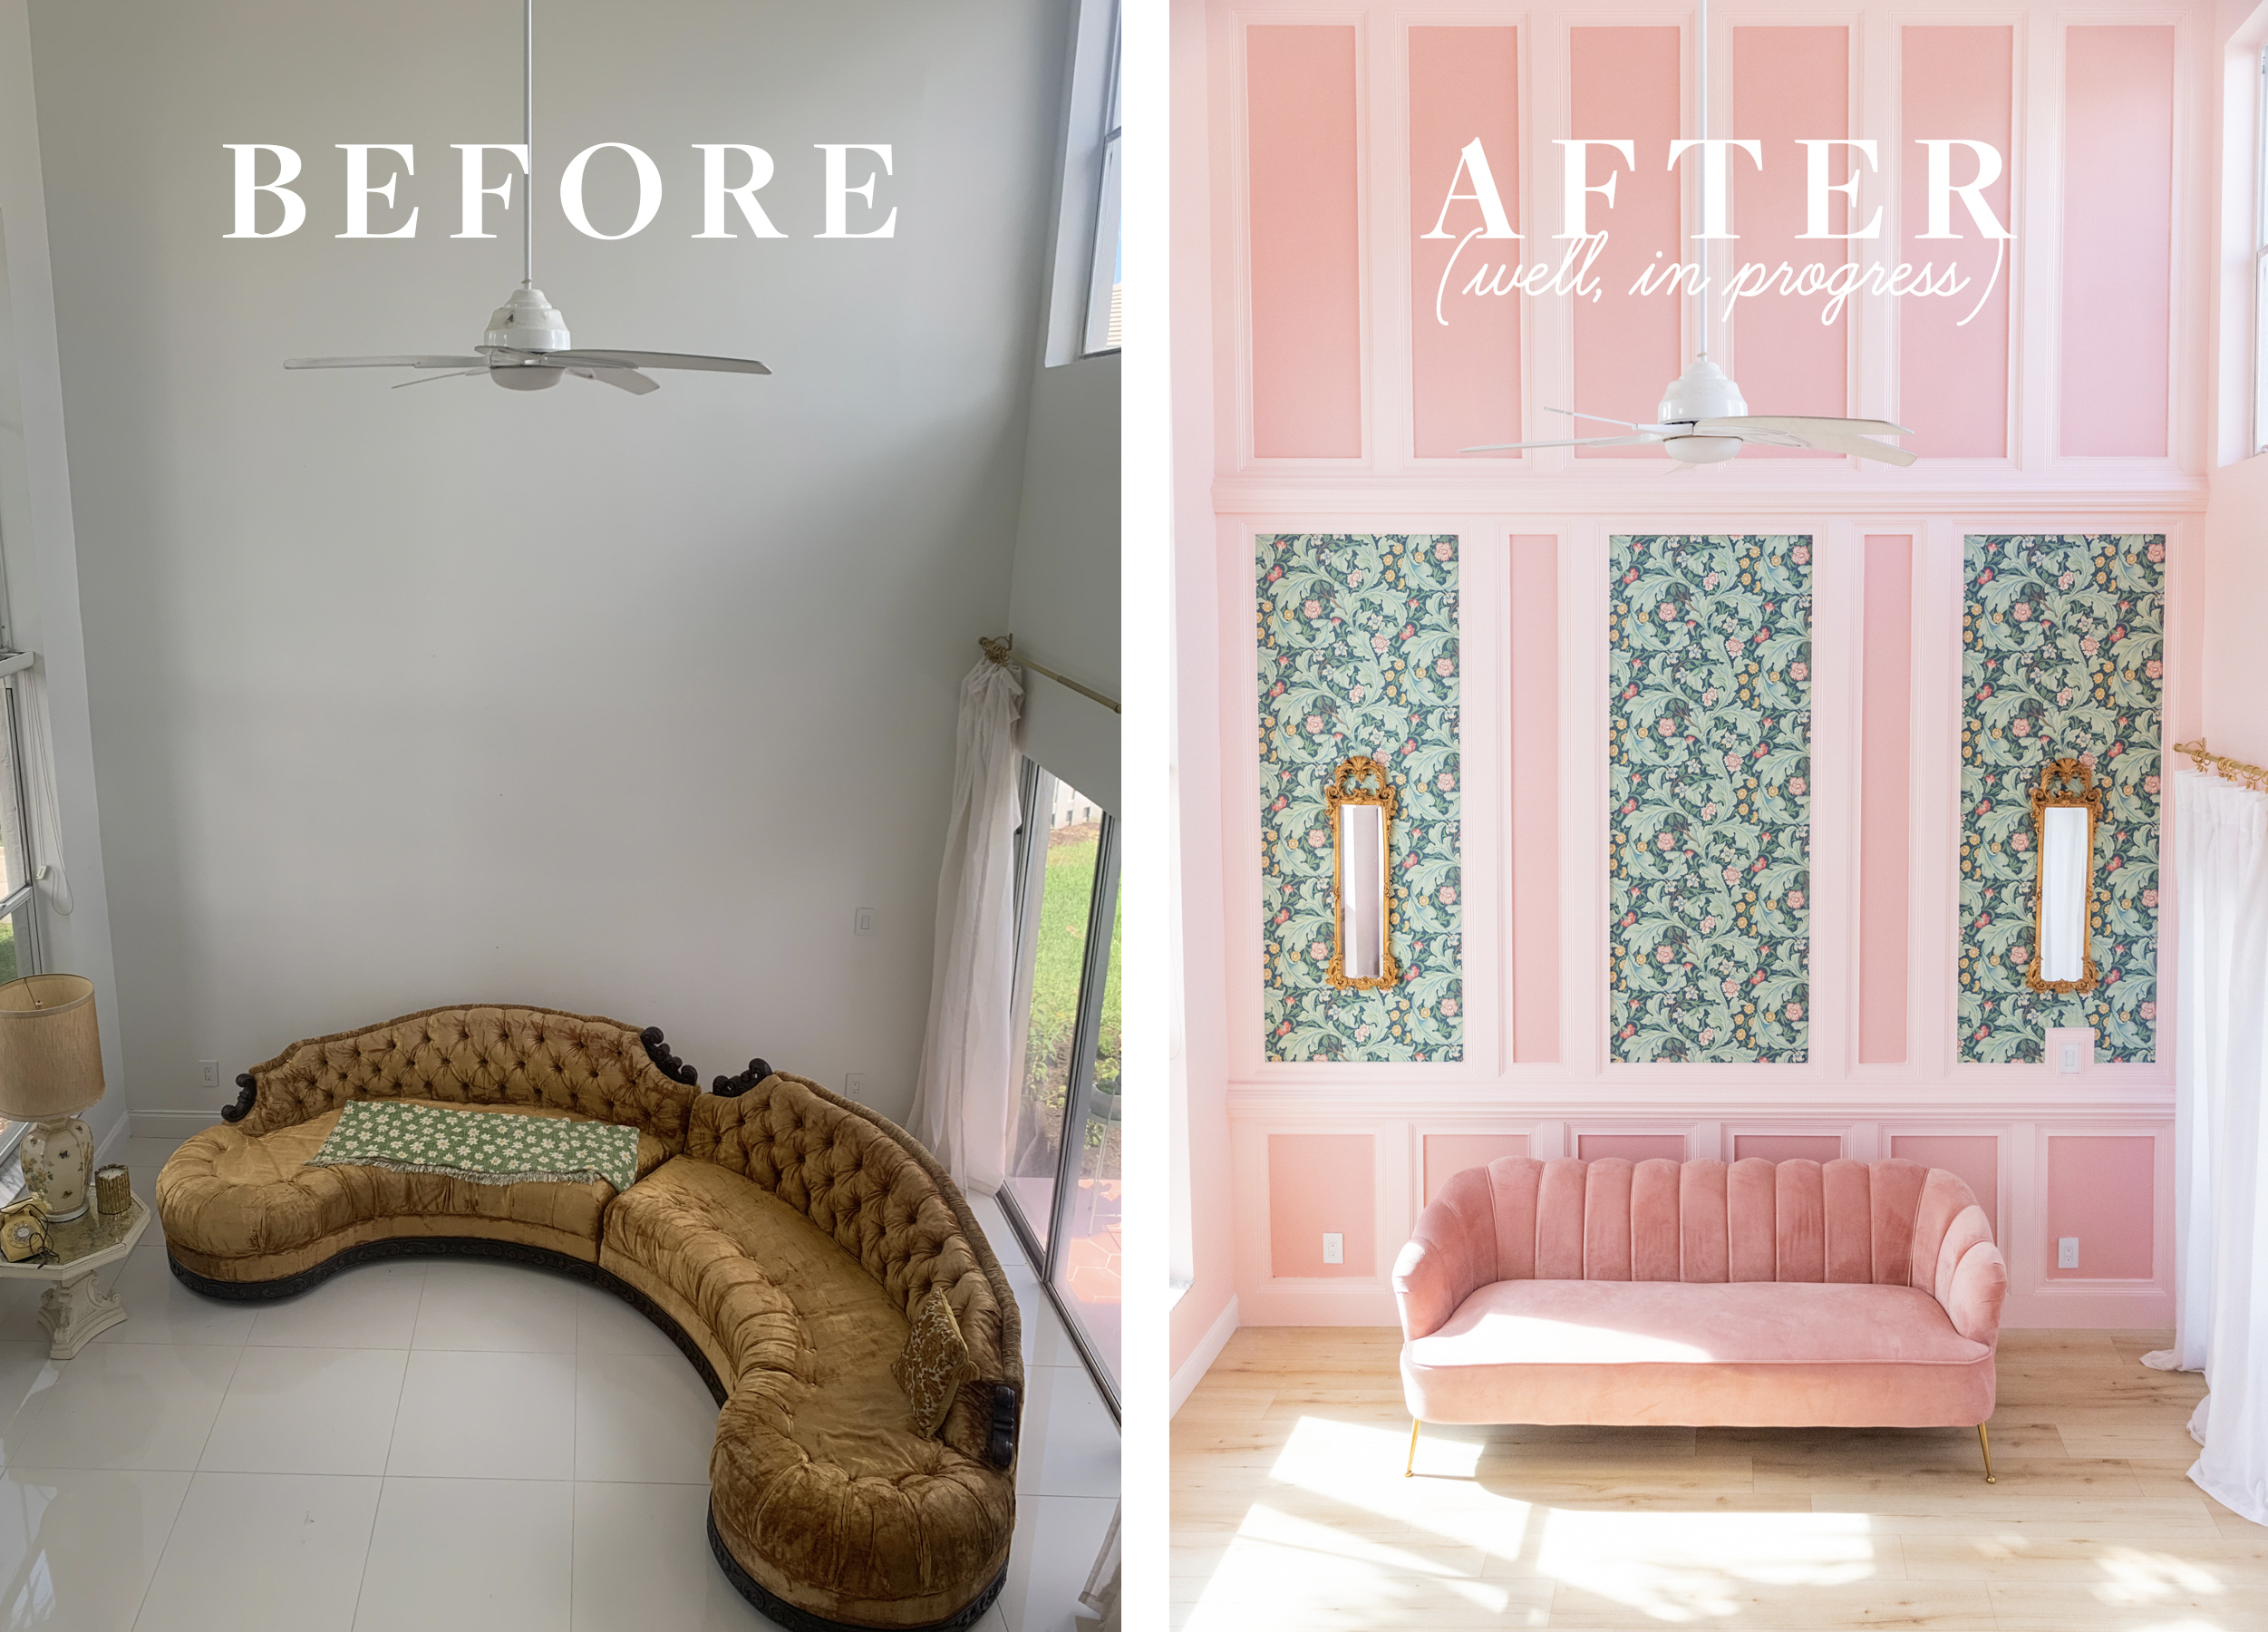
I have this bad habit of not wanting to show things until they’re completely finished. Also, I have a bad habit of never feeling like anything is fully finished. I like to take my time and find the things I truly love and will cherish, rather than rush to complete a room. Also, I have the antithetical habit of impulse buying vintage sofas. So, nothing I do makes complete sense…but we’ll get to that.) So, I’m breaking that habit and showing you our not complete but way way way better pink and green living room. Not quite an after — just an “in progress.”
Pink and Green Living Room Design Transformation with Havenly

This is the before that what we were working with: glossy white tiles with lots of dings and broken spots, giant walls, and a lot of light (a major plus). I knew the floors were going immediately. And the fan although you’ll notice it is still present, because I haven’t found the replacement yet. My objective was to make this room feel cozy. Have a small bit of storage for my smaller photo equipment, and still have space to shoot when needed. So, nothing too cumbersome to move.
While I love decorating. I sometimes I find layouts tricky. In this case, I had an all new obstacle: how to make a relatively small but open and very tall room feel cozy. Look at the crazy ceiling height! I didn’t know what to do with it. So, I turned to Havenly, who kindly offered their assistance in figuring this out. I combed through their designers and found one whose aesthetic seemed more aligned with mine: Samantha Shoffner. She helped me tackle my design issues through a series of questions, conversations, and mood boards. I am so glad I sought out a professional opinion.


Those boxes were our flooring, waiting to go in.
But first, let me explain the sofa situation. If you follow me on instagram, you already know that I bought some (yes, more than one…) vintage sofas a bit impulsively. Some people buy gum in a checkout line; apparently, I buy vintage sofas.
Anyway, I digress. I found this sofa at an estate sale and I fell in love, but left it. Later, the sellers found me online and contacted me, offering it to me at a discount. Did I need it? Absolutely not. But did I “need” it? Yes. It was a little too big for the room it was intended for, to be quite honest. But I felt like such a tall room might do well with a gigantic sofa. So I asked Samantha at Havenly to consider this sofa a non-negotiable part of the room design. It’s turned to the side in the photo above, but we planned to have it against the back wall.
I had a very specific color scheme and vibe in mind. I wanted wallpaper but was picky as all get-out about it, and suffice to say that this was no small task. So, I mean, it’s quite a statement piece. After matching with Samantha on Havenly (you can choose your designer!) and having a chat about the direction I wanted to go in, she walked me through the rest of the Havenly design process:
Havenly design process
Phase 1: Ideas
After a q&a and sharing some of my own inspiration boards, we entered the idea phase. It included some initial idea boards for my feedback. She suggested products, and I had the option to like or dislike (and leave specific comments) on each. This helped her determine a direction to go in for…
Phase 2: Concept Board
Next, came the concept board helped nail down the direction we wanted to take the space overall. She took the products I liked and put them together to see where things were heading.
Phase 3: Layout
Once there was a little more direction, Samantha put together 2d room renderings with styling and layout using the selected pieces, plus a floorplan to scale.
Once all of that was settled — we went through several changes and concepts, and she was kind and patient. Samantha came up with some ideas, made some mood boards and product suggestions, and I fell in love with this one:


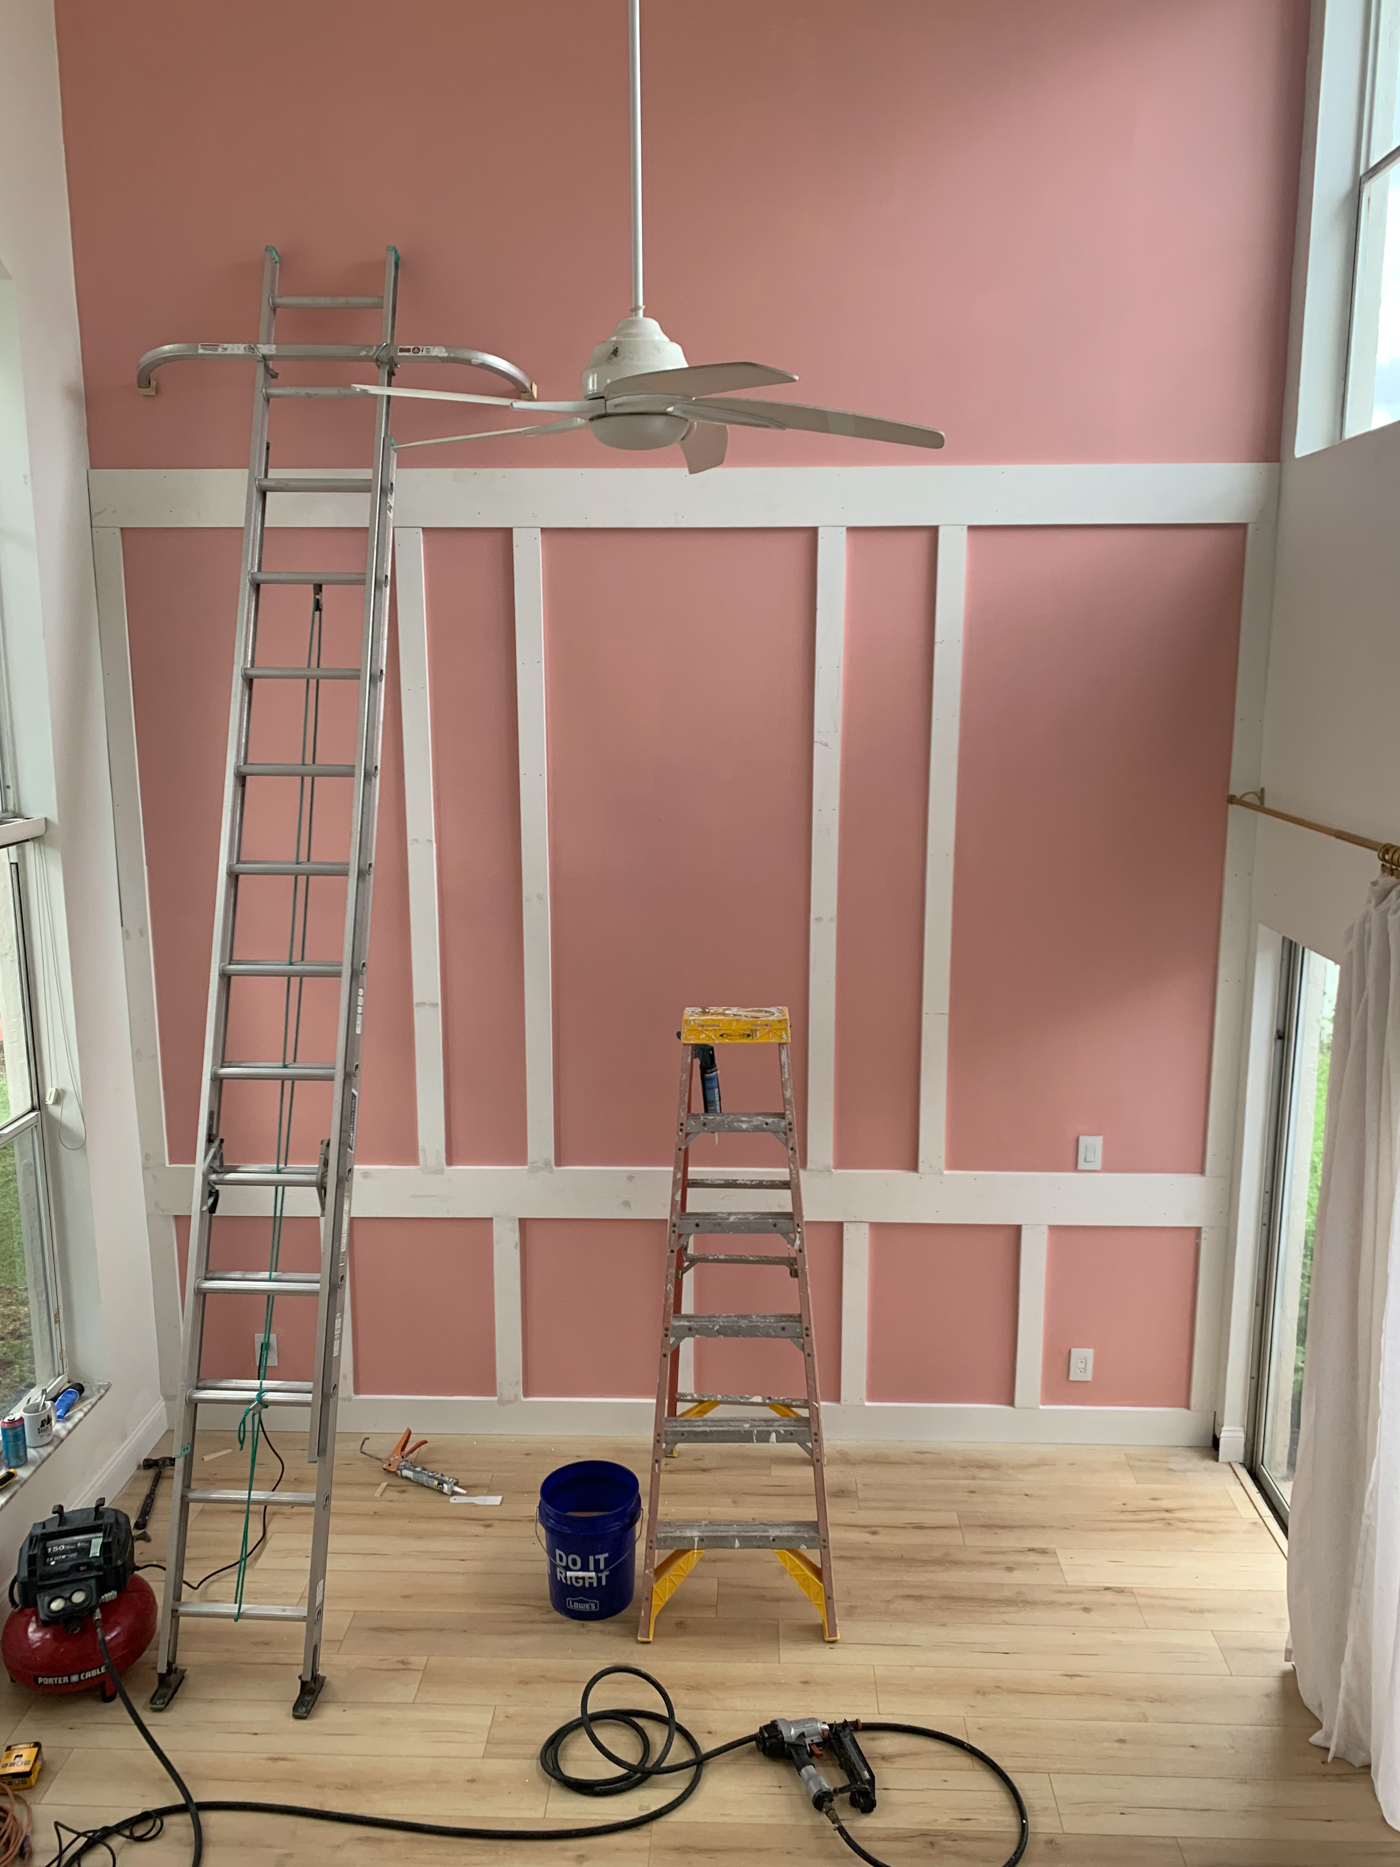
It took awhile to actually get started.
It was because we were waiting on renovations to happen before getting to the fun decorating part. After the floors were in, we hired contractors to paint and install the moulding and wallpaper. Here it is in its beginning phases, before the decorative moulding and lighter pink paint was put in! While that work was happening, we had some issues pop up with the vintage velvet sofa. I had it professionally cleaned. So, it cost more than what I paid for the sofa, and the velvet was just not the same. It was crunchy, stiff, and each side looked like a different color.
Then there was an accident on the sofa so we had it cleaned again, and it got even worse. Fabric started ripping in one corner, a spring broke and made it super uneven, and all in all I spent over $1,000 trying to restore it before realizing it just wasn’t going to work. It was a very expensive mistake.
After having Samantha design the room around a very specific sofa, we ended up having to get a new one. So, I picked out a lower profile, pink sofa because I was really loving the pinks and greens on their own, with gold accents instead of a contrasting sofa.
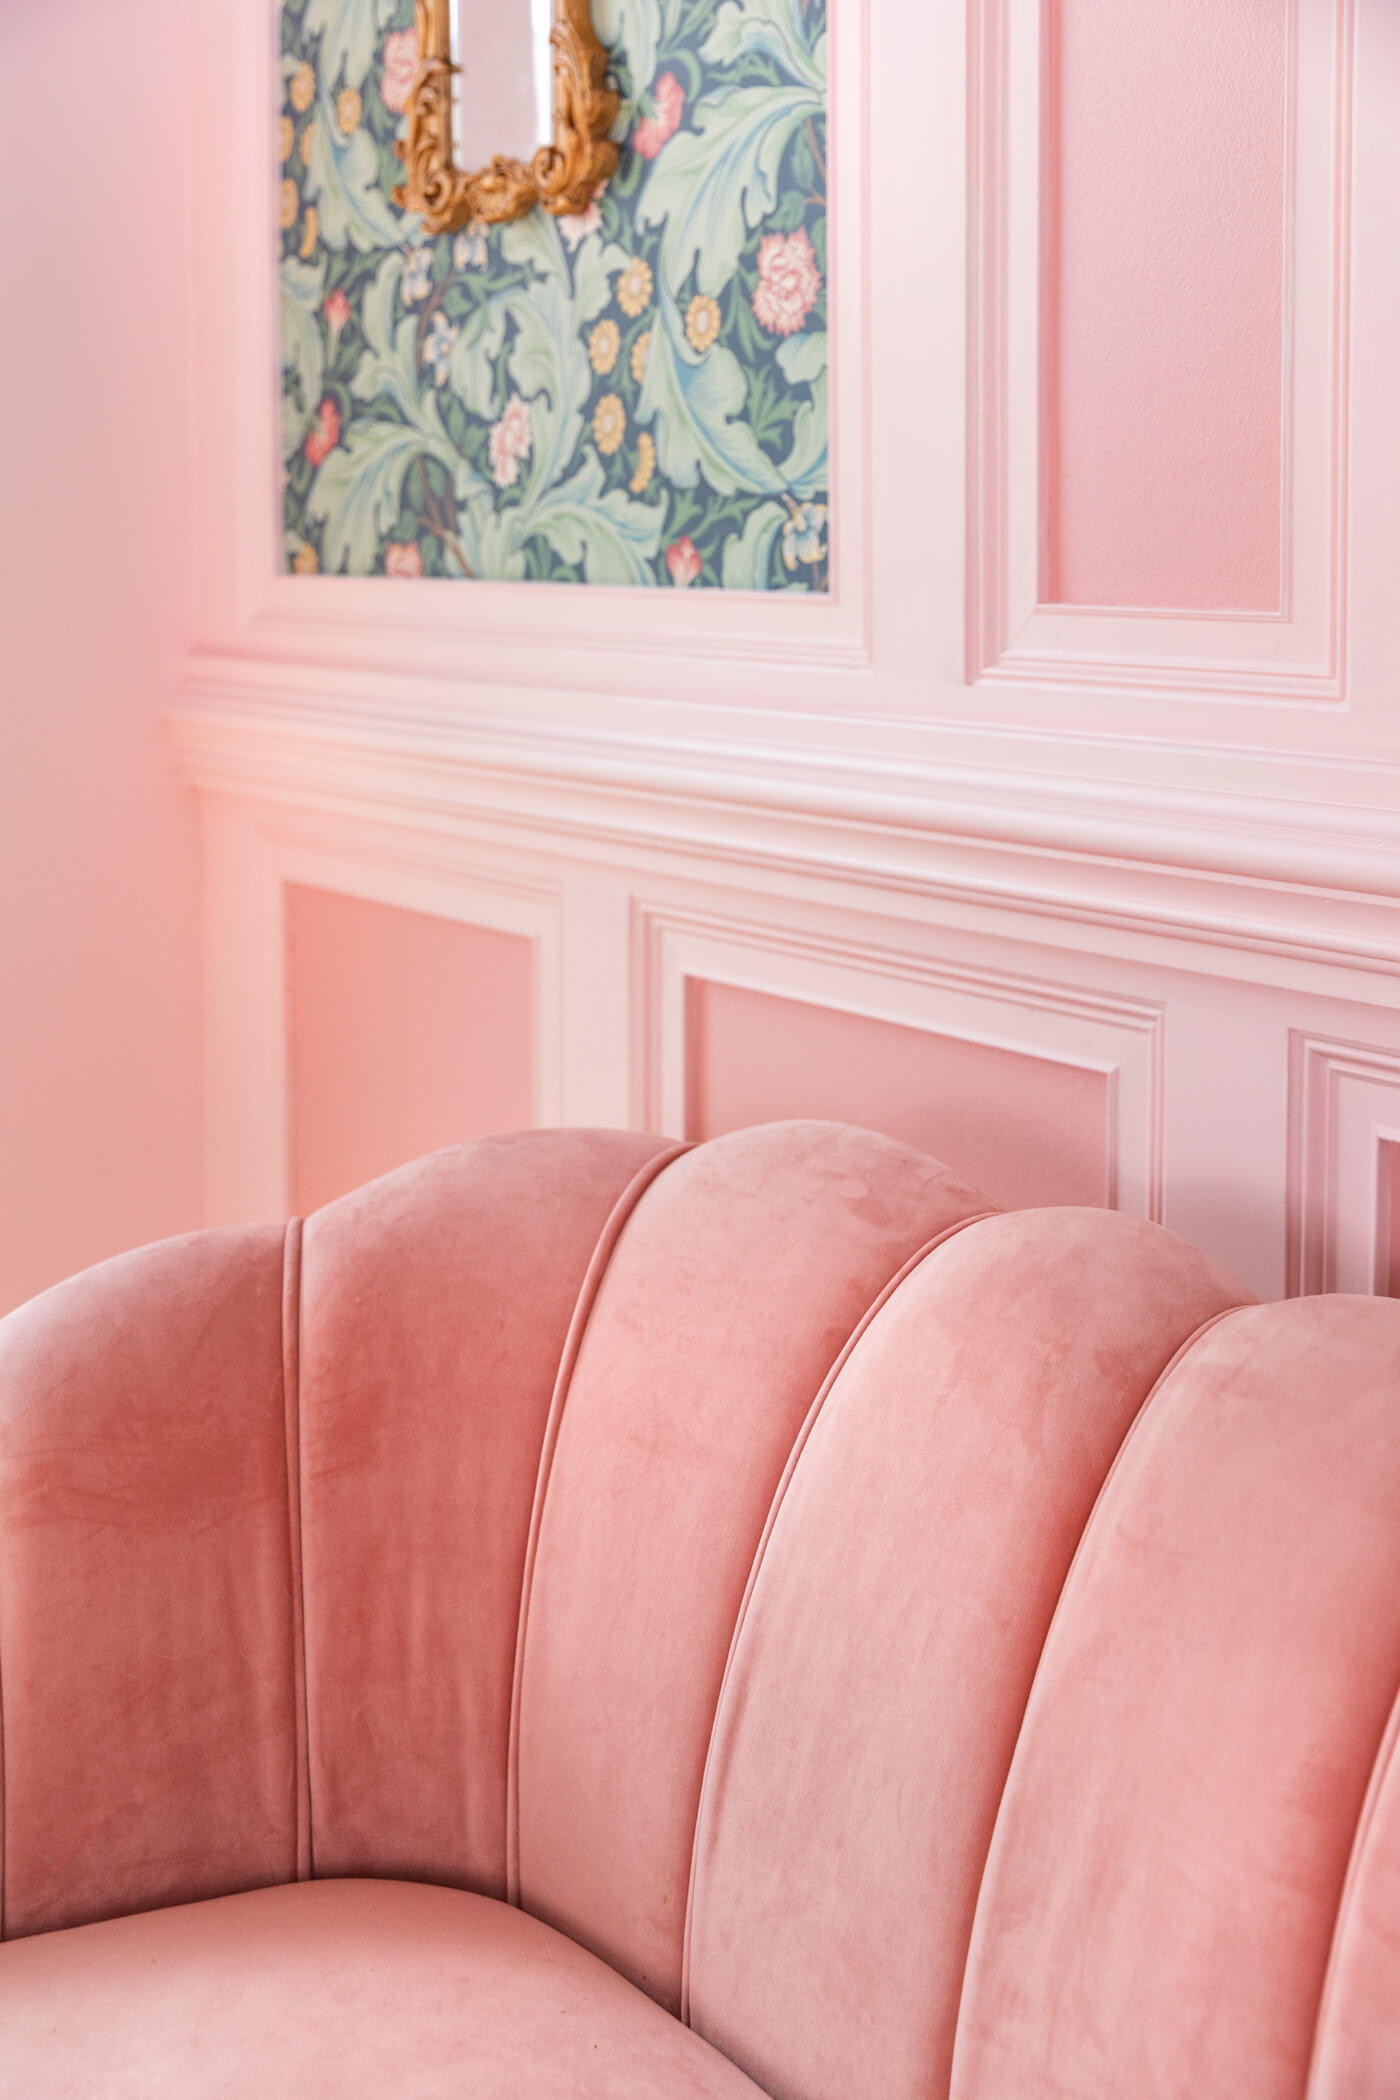
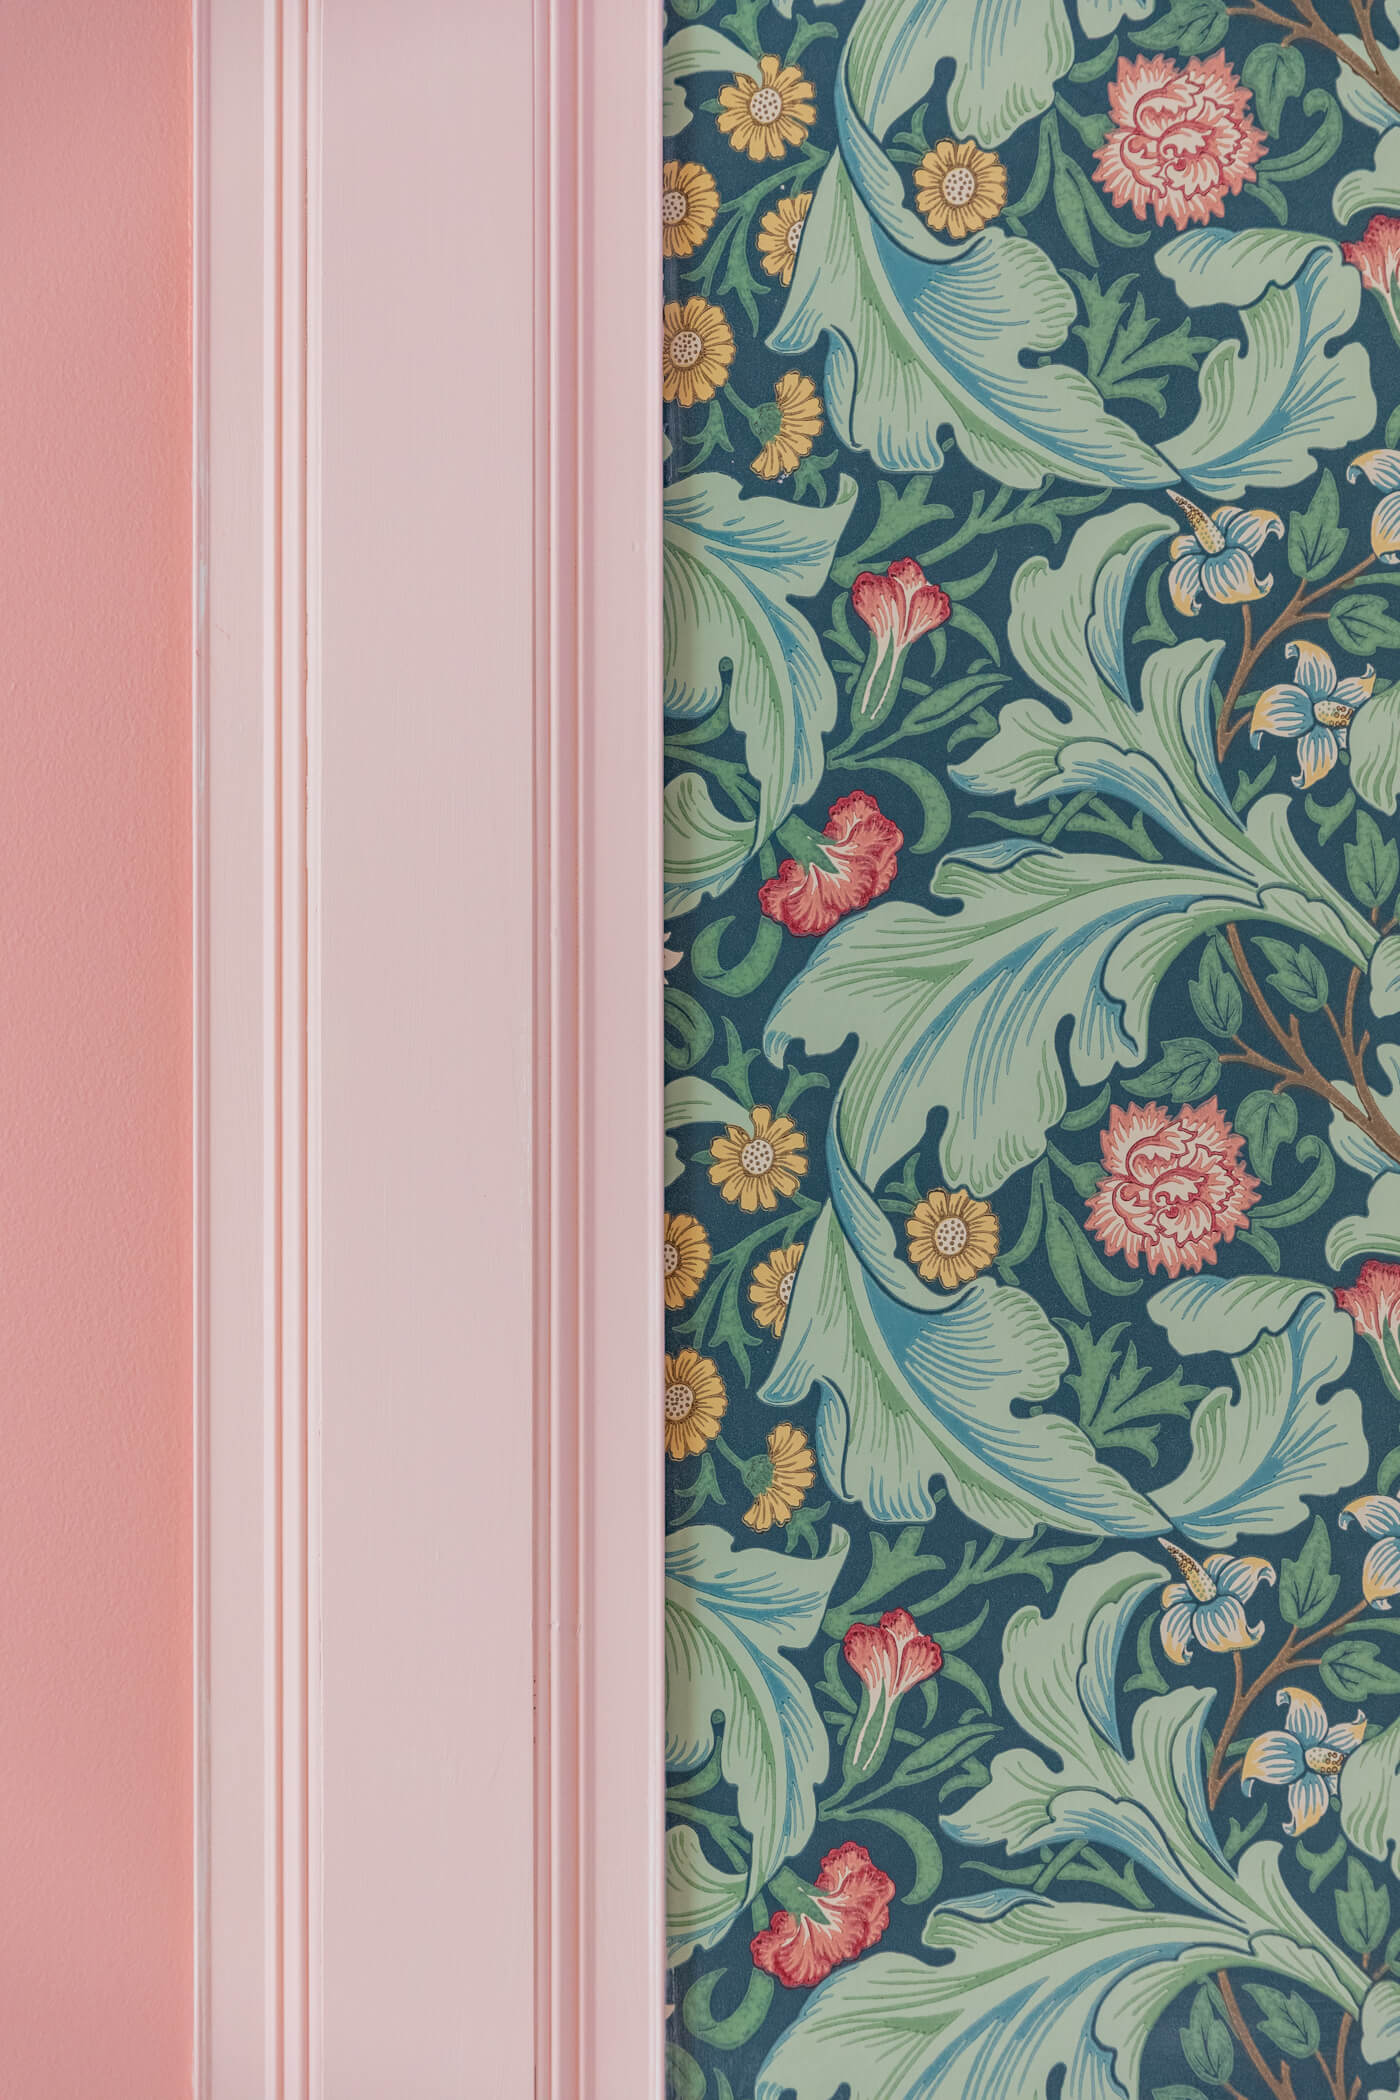
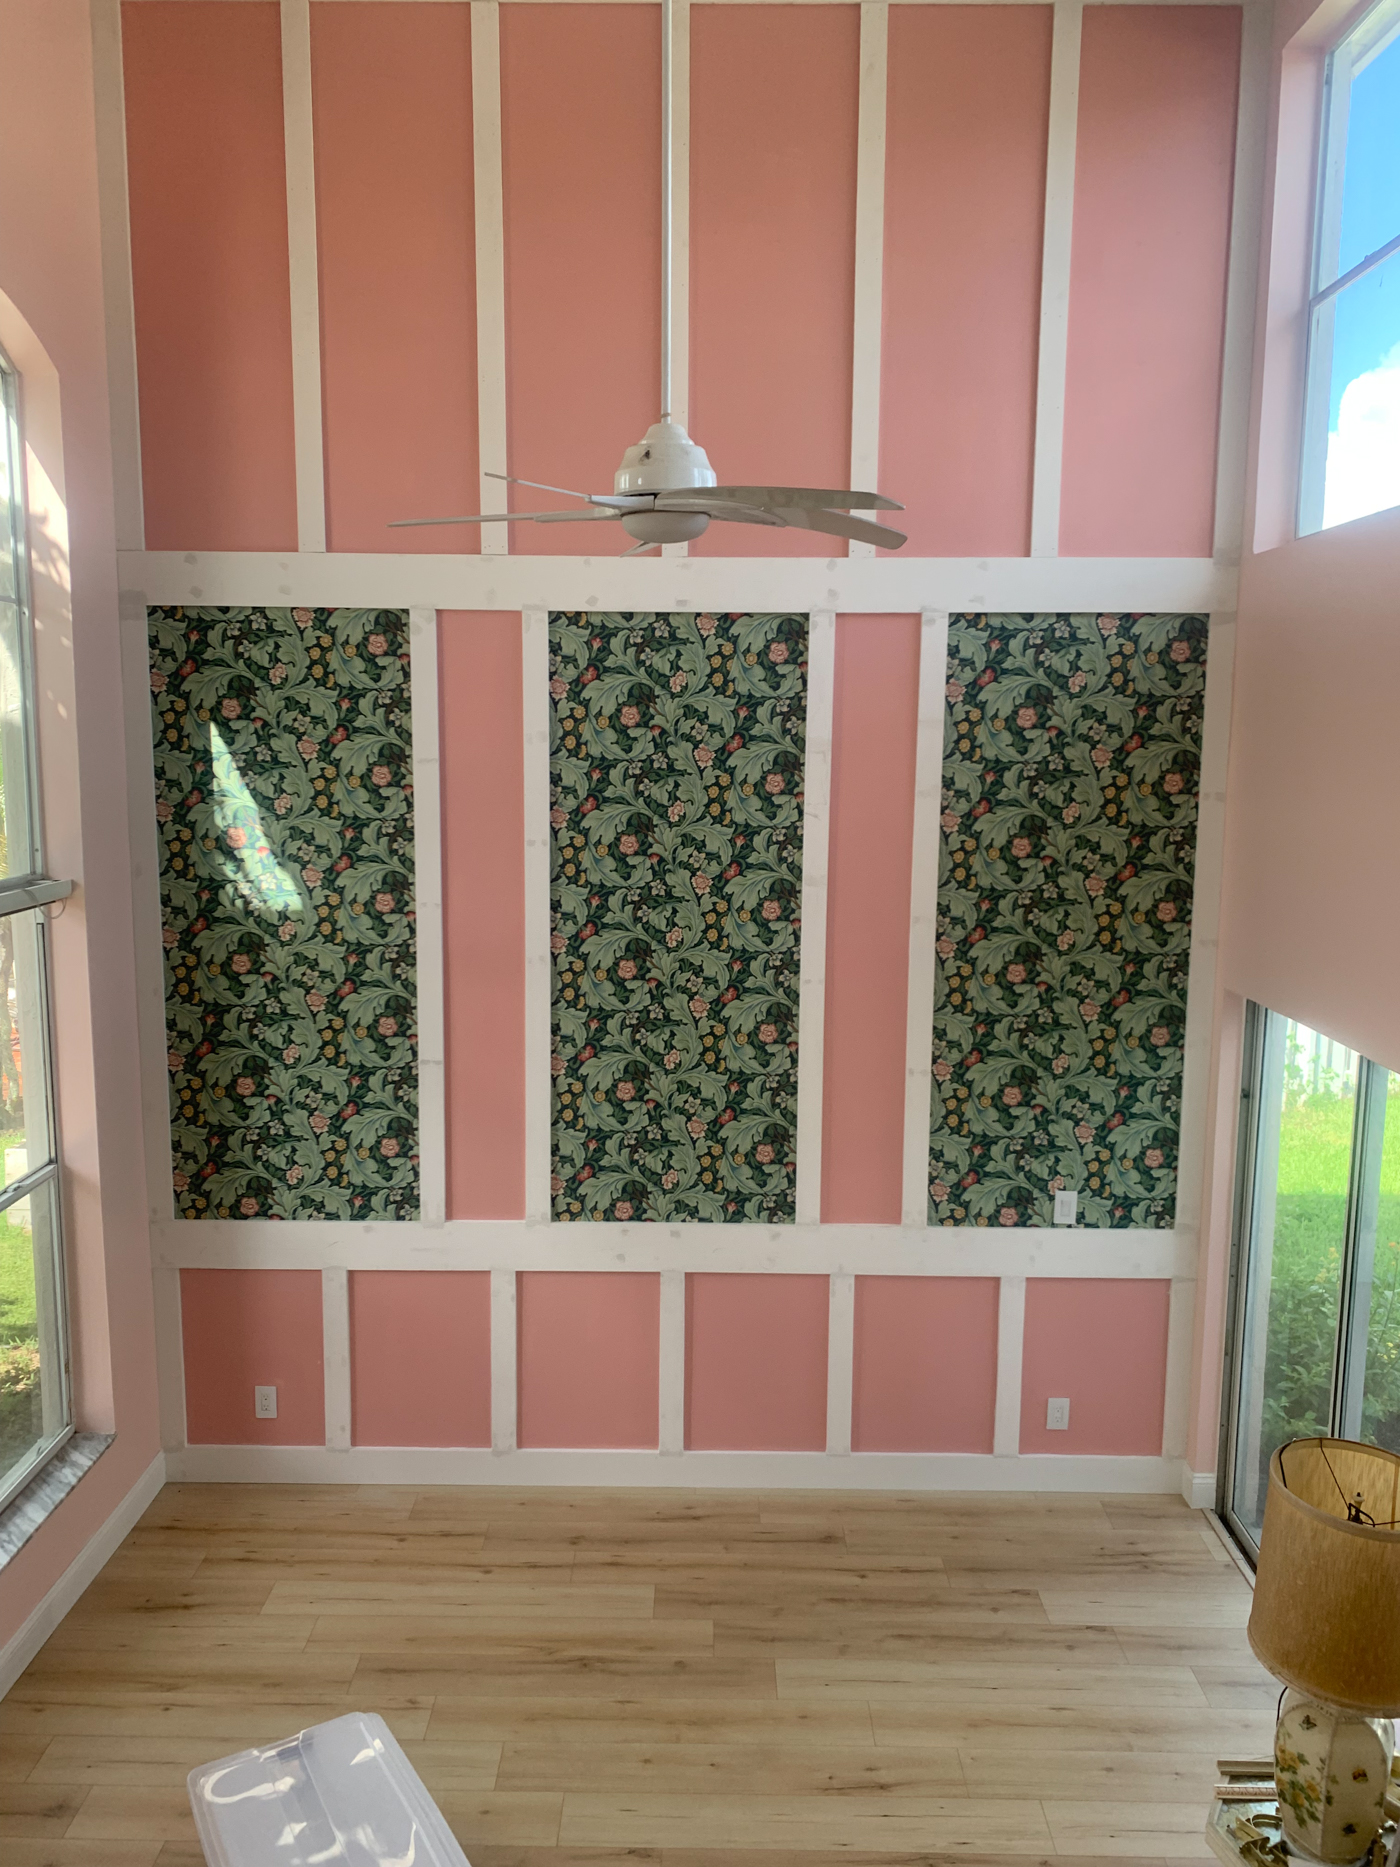
Left: details of the pink velvet sofa. Right: Moulding and wallpaper details — the icing on the cake!

Design Rendering of our pink and green living room
Though the “in progress” result is a little different from Samantha’s rendering, it’s only because of the sofa change and not feeling ready to “finish” it yet, with work still continuing in the house. We kept the main details intact: her moulding and wallpaper idea completely transformed the room! I also purchased the storage and 3 mirrors she recommended, but the large one was too big for the wall, so we moved it onto the storage cabinet.
Also, I purchased a faux plant she recommended to go by the sofa. But I ended up putting it in my sister’s office because it looked so good in there. I really loved the rug she picked out, but with us frequently puppy-sitting, we decided to wait on making a big investment in something she might mistake for a pee pad. So, I hope to eventually incorporate one, and I loved the one she chose. But I’m learning that it’s okay not to do everything at once.
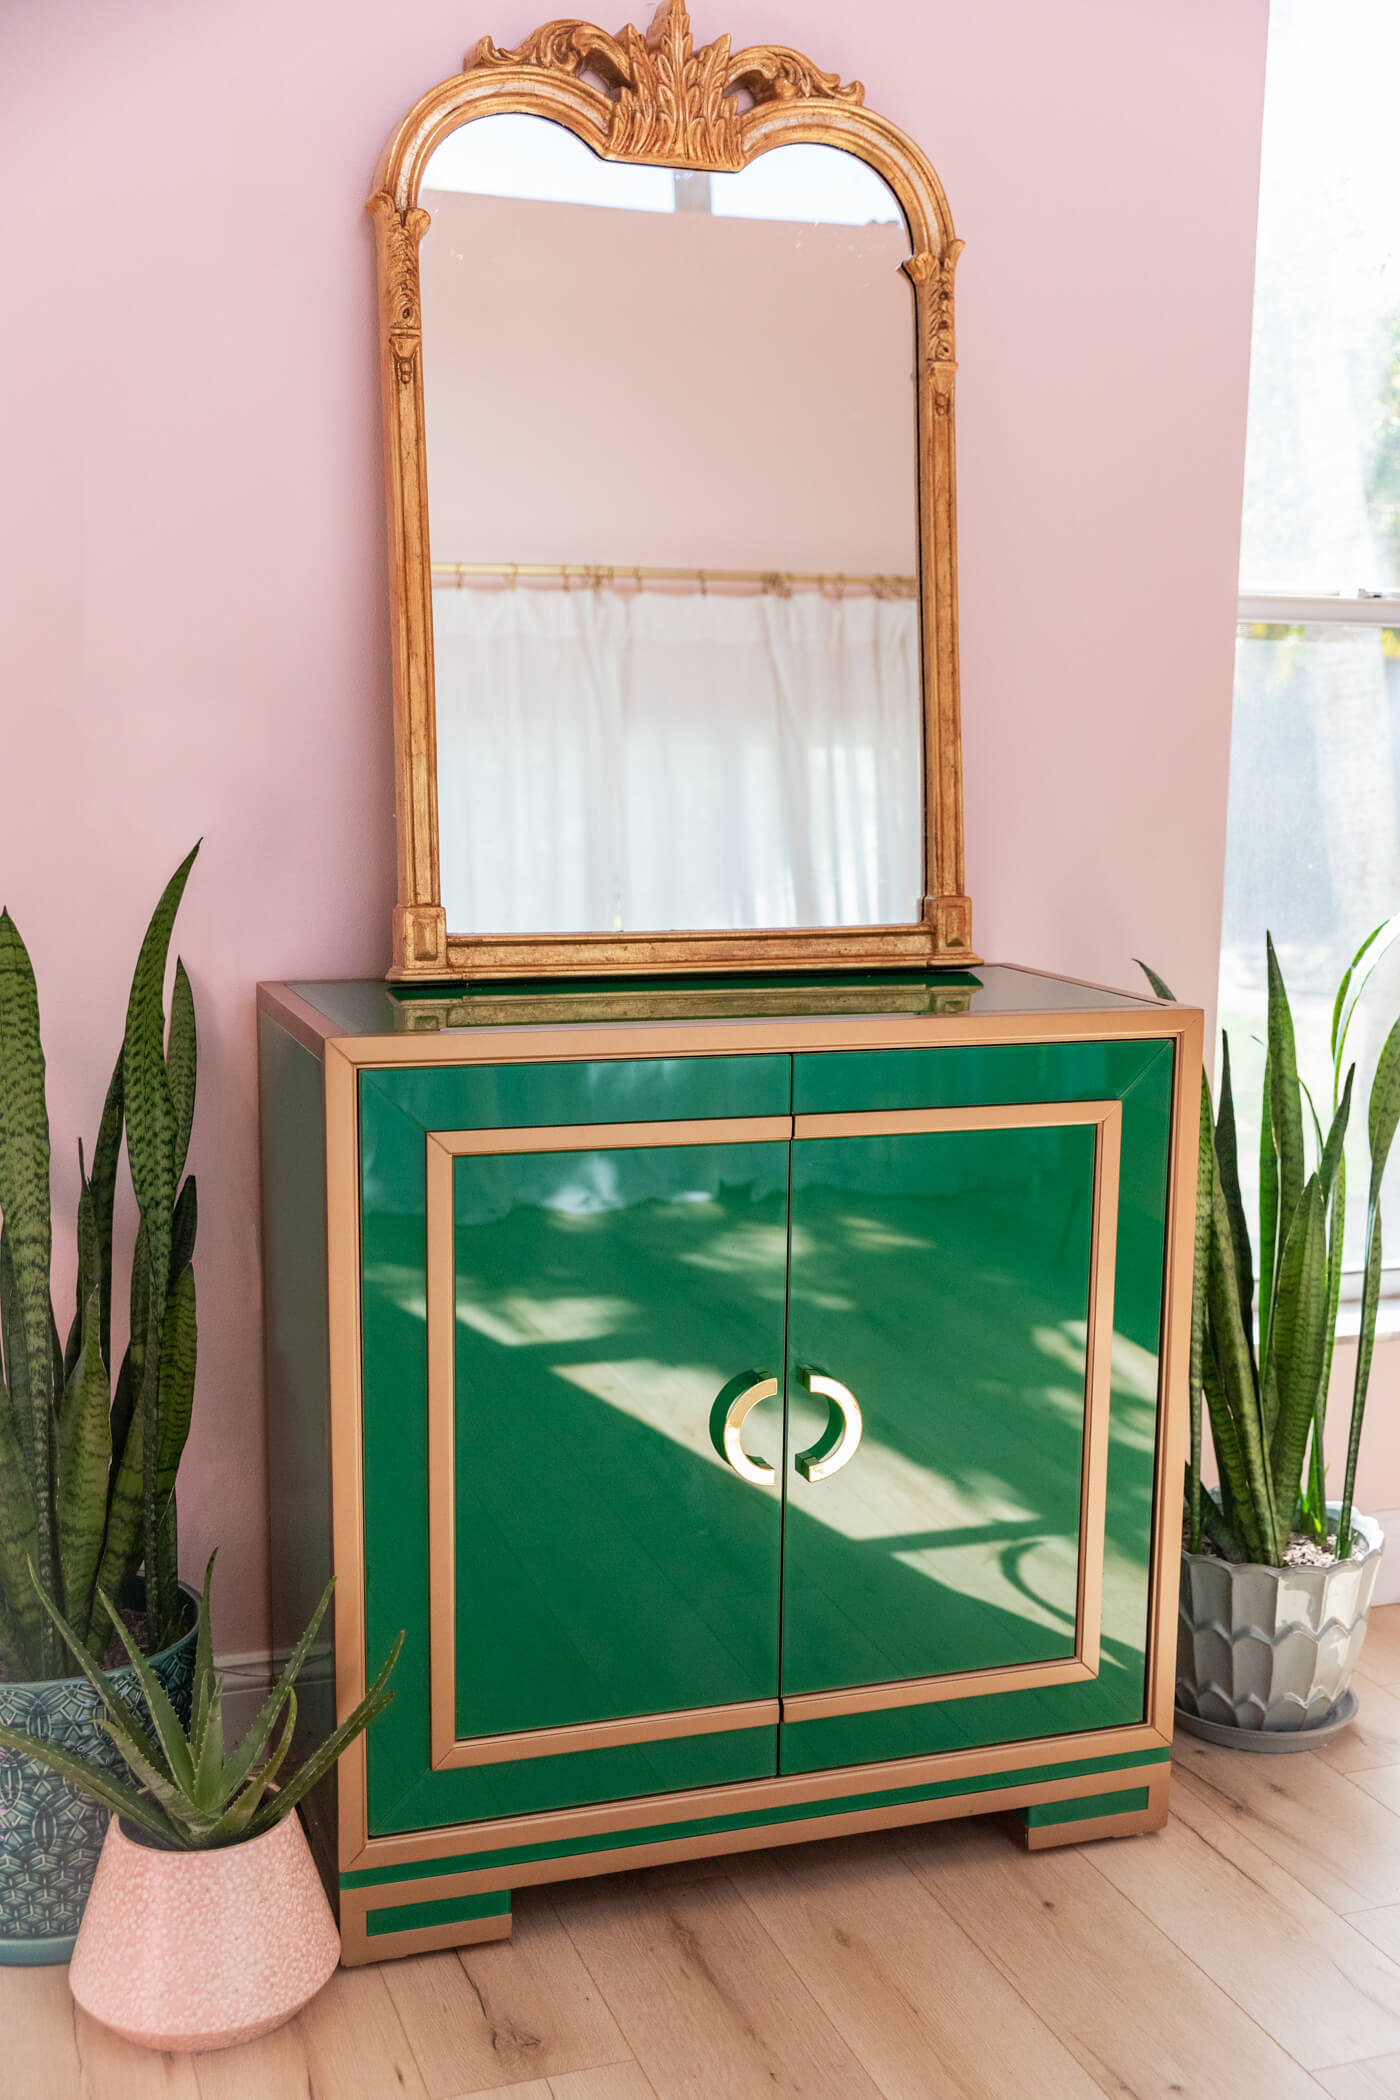

The Mirror
The mirror was a different color (more of a pewter), so I gold leafed and glazed it to match the others. I love the way it turned out. The storage cabinet Samantha recommended was sold out when I went to purchase, but I found the exact same one at HomeGoods while looking for a replacement solution. It felt like fate! It is the perfect size for this area and keeps my photo equipment hidden but handy.
That was something I loved: I could buy any of her recommendations through their site, instead of shopping all over the place. They have a ton of vendors to choose from and it makes it super convenient. But I also had the option of just sourcing it on my own and using it as inspiration. However, since the designers make a commission on items bought through the site, and the service is so affordable, I wanted to make sure I bought any new items I wanted through their own links.

Tips on Making Big Changes in Your Space
One tip that a friend told me to consider when making big changes is to live in the space for awhile before making decisions, and I’m glad I did. I had every intention of swapping out this fan for a chandelier, but on hotter days, this room gets stuffy without the fan. So, right now we are looking for a pretty fan to replace this (I have it narrowed down). The curtains are inexpensive linen that we put in for privacy, and eventually I would love to have custom window treatments to fit the grand size of the ceilings, but for now…these will do. Have you ever seen how expensive custom curtains can be? I’m not ready.
I’ll keep you updated as we continue decorating, but I have to say that having such a gorgeous transformation has made me much more comfortable with taking my time instead of rushing to make something happen. Even at its most simplistic state, the wall makes such a huge and gorgeous statement. I’m so grateful that Samantha at Havenly was able to create such a beautiful design solution! I couldn’t have done it without her.
If you’re interested in trying out Havenly, use my code KEIKO for 25% off mini and full design packages.